Hacking AES (ECB mode) Cipher using Julia
Oct 21, 2018

This blog post walks through how to solve the SpyFi problem from the picoCTF 2018 competition. The problem involves an encrypted message that uses an AES block cipher and the objective is to exploit the weakness of the block cipher and find the secret message inside. The code was written in Julia.
The SpyFi Problem
Here comes the question:James Brahm, James Bond’s less-franchised cousin, has left his secure communication with HQ running, but we couldn’t find a way to steal his agent identification code. Can you?
It comes with a simple Python program that runs on the server:
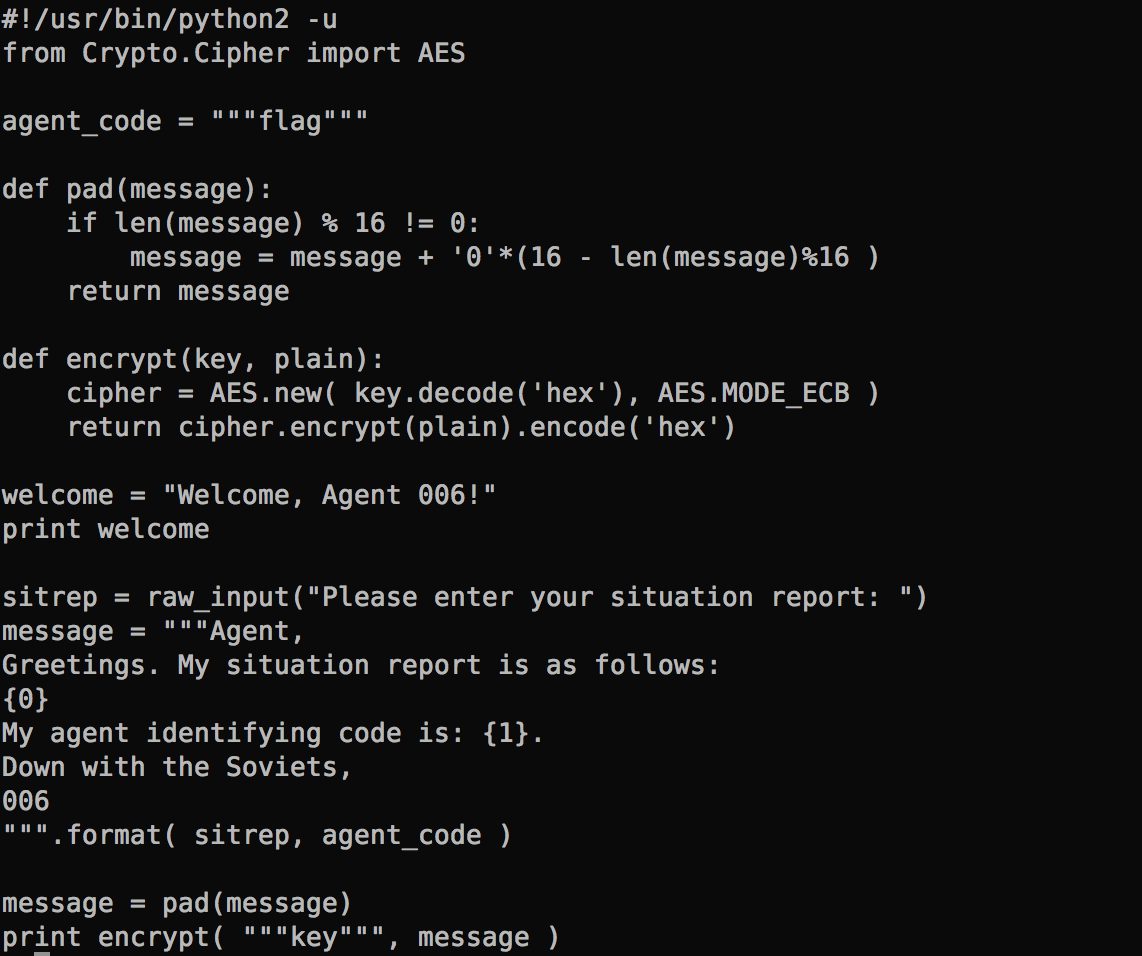
When I connect to the server, it asks me to enter the situation report. Then, it spits out the encrypted text. The agent code is embedded in the encrypted message, and the goal is to figure out what that code is.
Solution Walk-through
The Exploit
Knowing that the code uses AES ECB mode is a big help. This method of encryption has a major weakness – a messages is divided up into individual blocks, and then each block is encrypted independently using the same key. Hence, when there are two identical blocks in the message, they will generate the exact same cipher text. If an attacker can manipulate the blocks then the message can be decrypted easily without using the key.Block Size
What is the block size? That’s easy — in fact, it’s already given in the Python code above. The pad function ensures that the message is padded to zero characters to a multiple of 16 bytes.Let’s first build some tools!
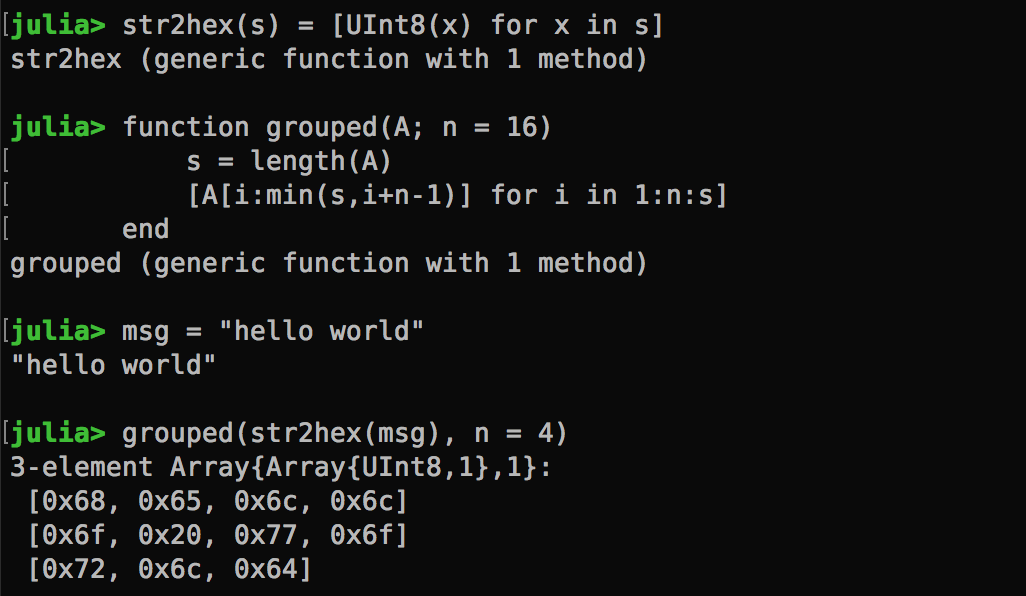
I used Julia as my primary language for this competition. Julia is a highly productive, general programming language that let me focus on the task and write code quickly.To better visualize how the message is chunked in n-byte blocks, I created the following functions. The str2hex function converts a string into a byte-array, and the grouped function takes a byte-array and split it into n-byte chunks (without padding).
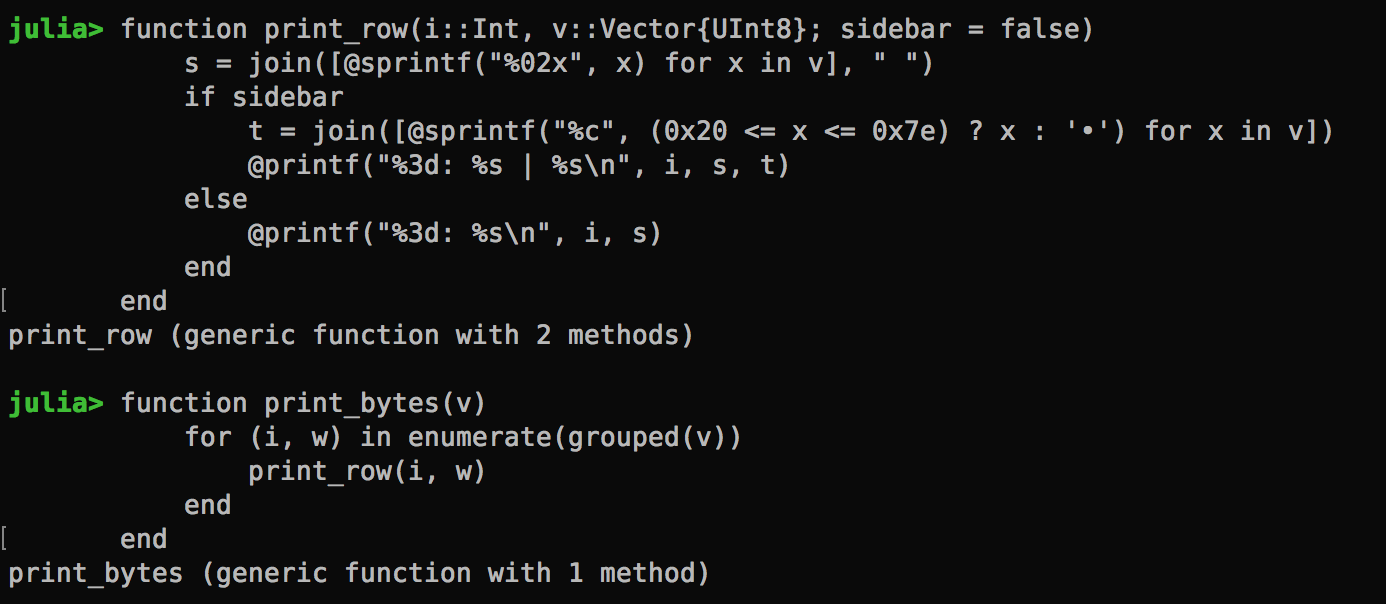
I didn’t quite like the verbosity of the 0x prefixes though. Plus, I will have more context if the text is displayed on the right hand side. So I created a custom print function:
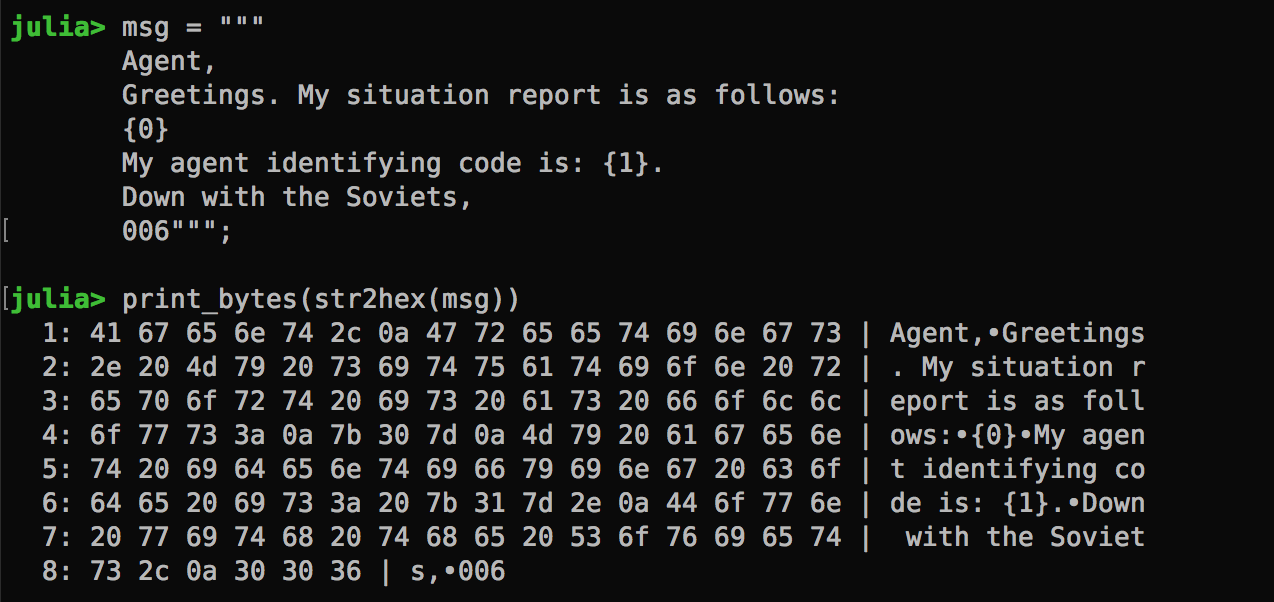
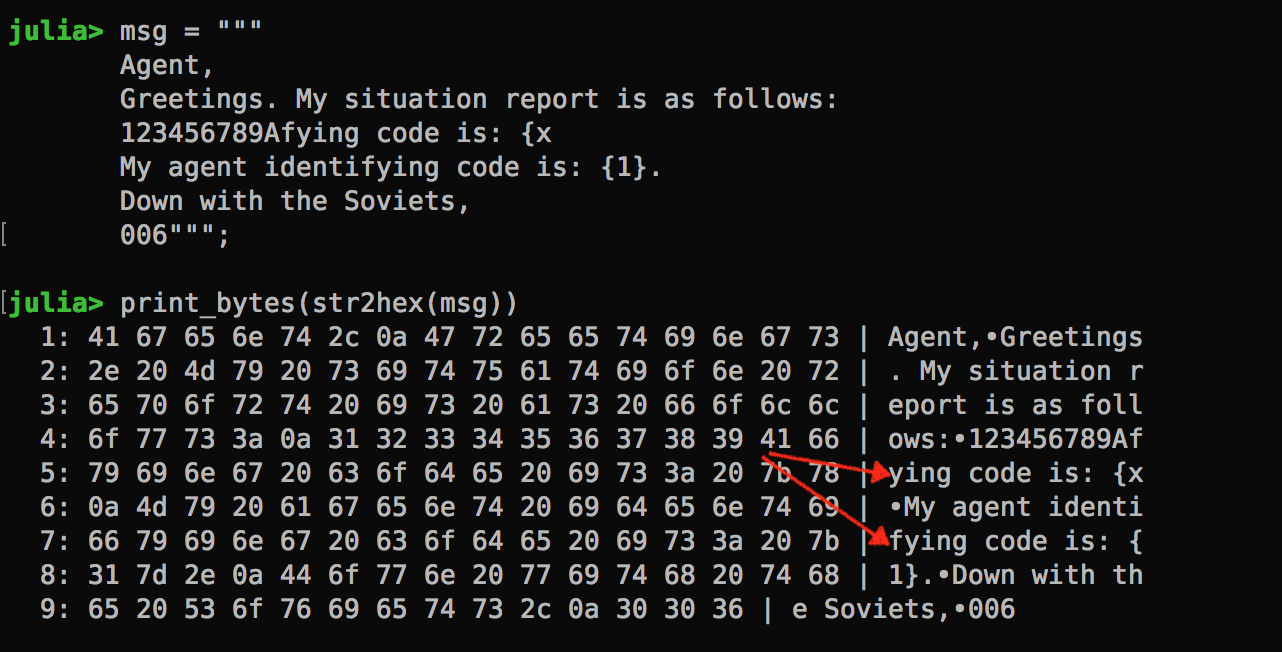
The Agent Message How does the agent message look when it’s chunked up into 16-byte blocks?
Manipulating Blocks
Now, given that I can control the the situation report, I would be able to shift in any direction where the agent code is cut up. In the illustration above, the situation report is {0} and agent code is {1}. Let’s say I change the situation report to {000}, the agent code would now be shifted 2 characters to the right.Being able to cut up the agent code into separate block allows us to decipher the agent code, one character at a time. How?
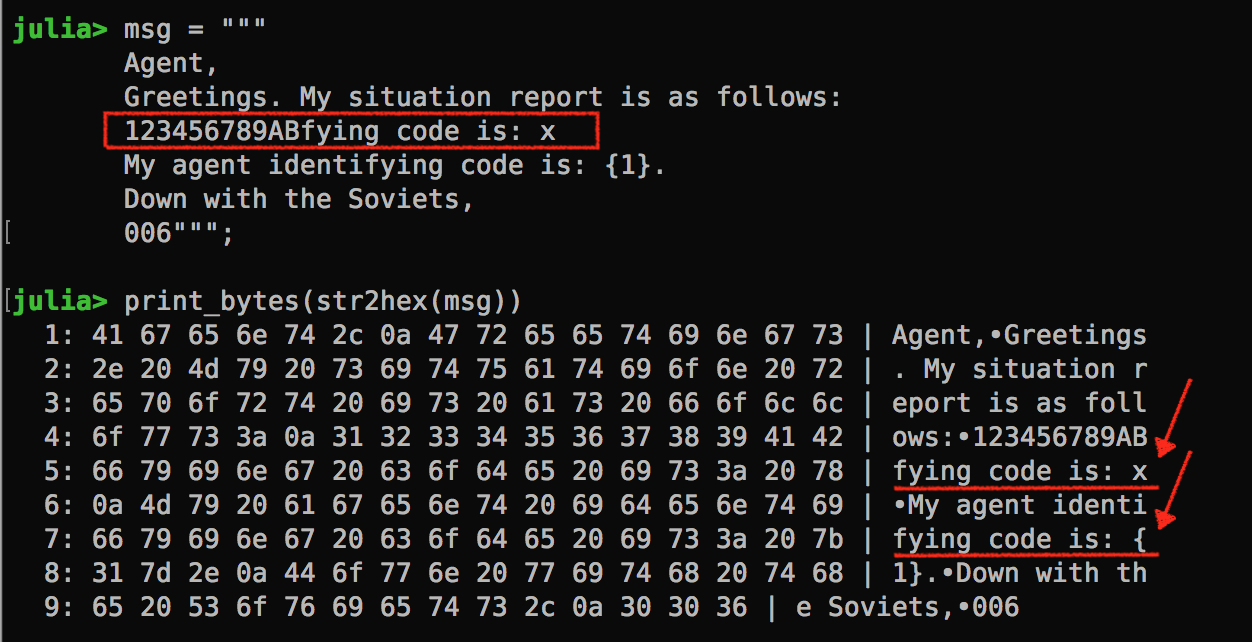
Cut the agent code such that the first character is at the last position of the block; Replicate a similar block in a different part of the message; In step 2, we can manipulate the last character using a brute-force attack. If the cipher text for both blocks match then we know what the first character of the agent code!
Let’s take it through an example. Below, if the cipher text for block 5 and 7 are the same, then we know the first character is x.
Once we figure out the first character, we just need to shift the agent code block left. But wait, it’s a bit trickier than I thought. I can remove the B from block 4, and add a new guessing character but then the agent block isn’t shifted at all.
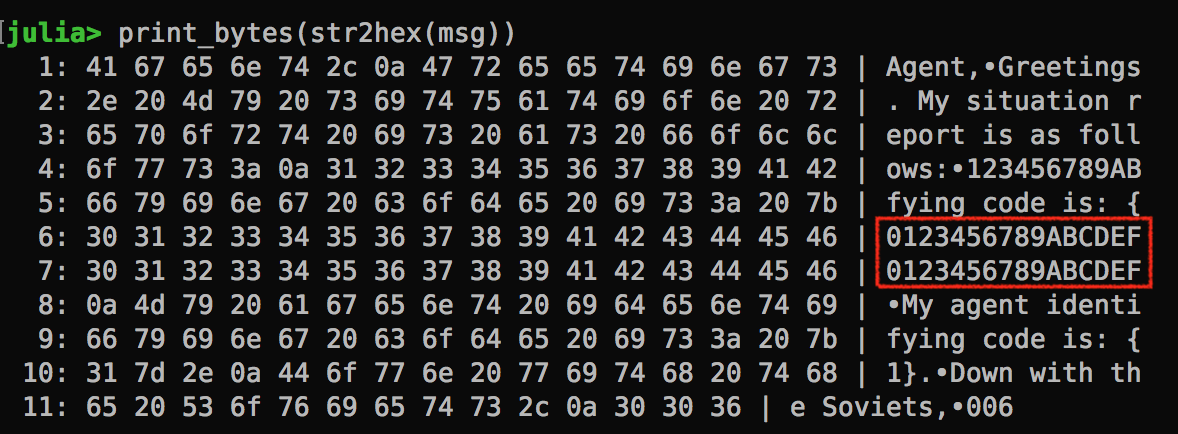
The solution is to put additional blocks of dummy text at the end of the situation report, so that we have something to take off when shifting left. Now, given this additional padding, we will have to compare the cipher text of block #5 and #9. If they match, we have a hit!
When Rubber Meets the Road…
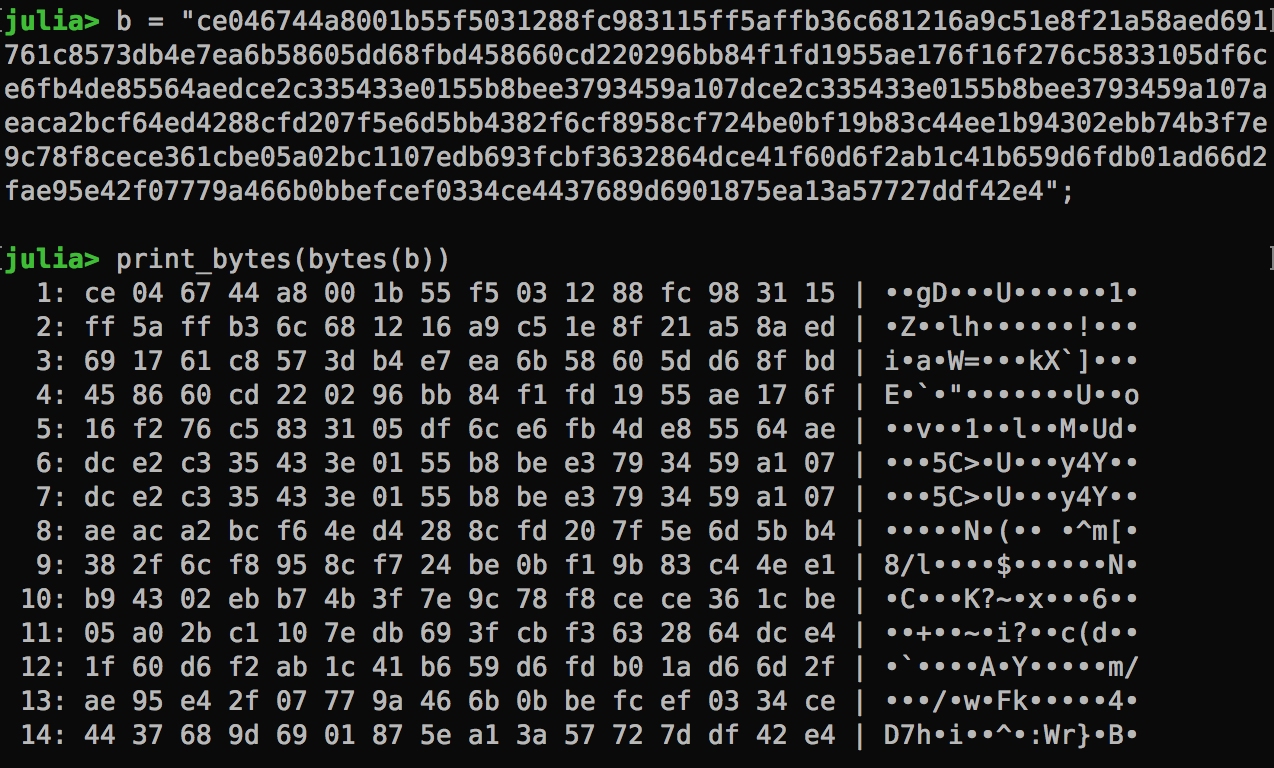
When we submit a situation report to picoCTF, it returns a string of hex codes.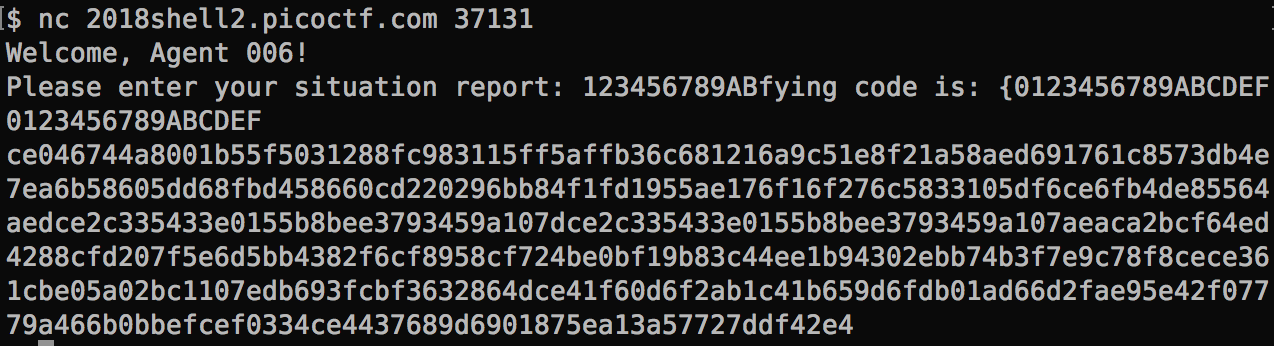
My julia function now comes handy. Let’s analyze the byte array. We can clearly see block 6 and 7 are identical. They came from the two dummy blocks of 0123456789ABCDEF.
Submitting Tests Automatically No one would perform any brute force attack manually. Here’s the automated checking code:
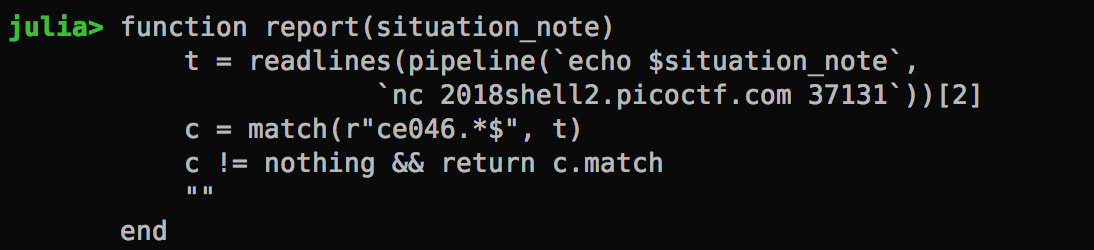
It basically hits the server, submit the situation report and grab the result. Knowing that the first block is always the same, it finds the line that begins with ce046.

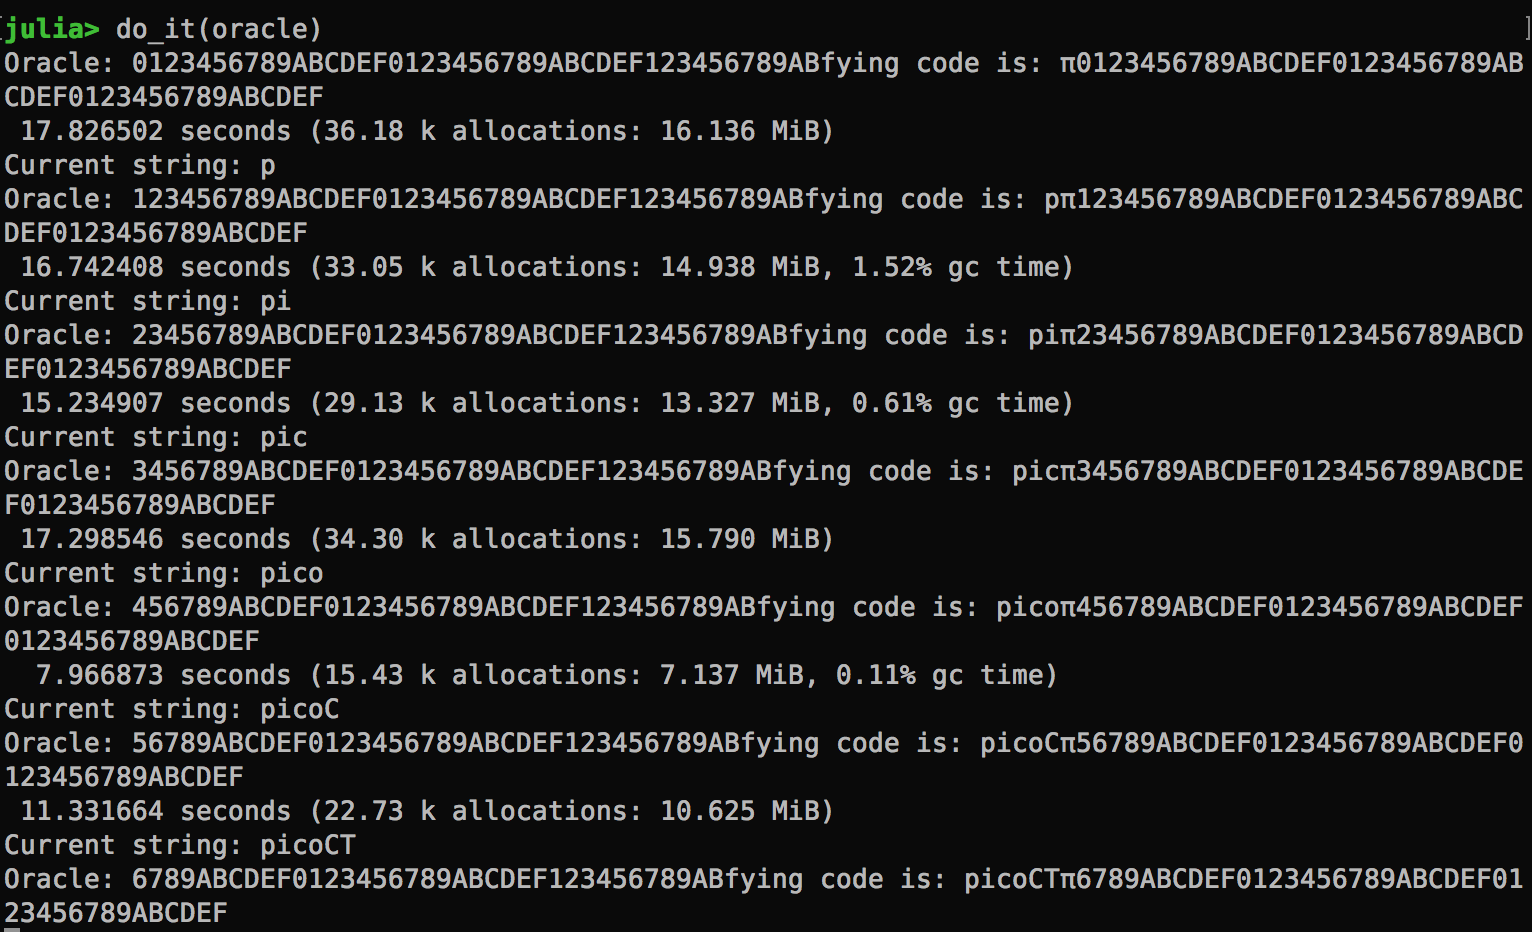
Brute Force Function
This function takes the situation note with a placeholder π, which is replaced with the guessed character and submitted to the test server. The function loops through all printable ASCII characters. When the result comes back, it’s grouped into chunks of byte array. If the two specified blocks are identical, then it returns the character.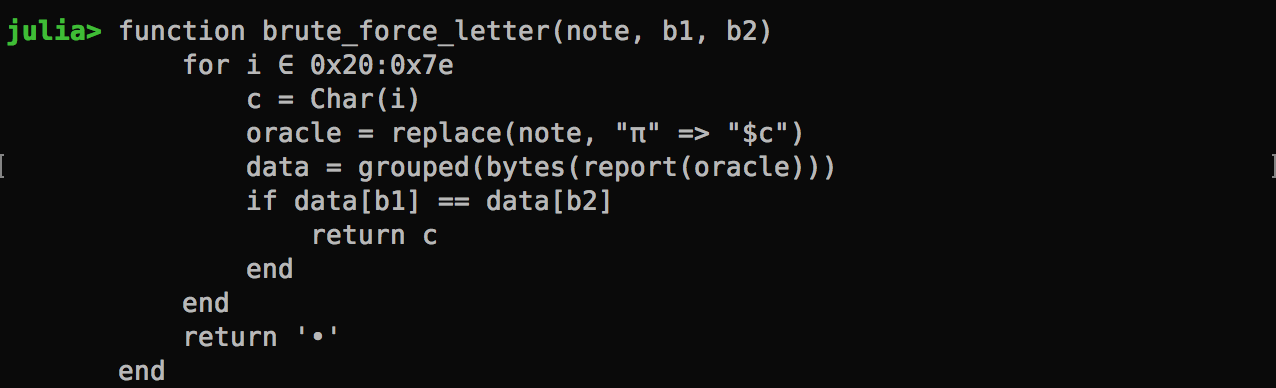
Here we go for the first character!

And, the second character!

Looping it all
The reality is that the agent code is quite long in this problem. Hence, I ended up with a much longer encryption oracle. A new function is created to run the brute force attack up to 48 characters (I don’t really know how long is long enough but I can stop the loop any time.)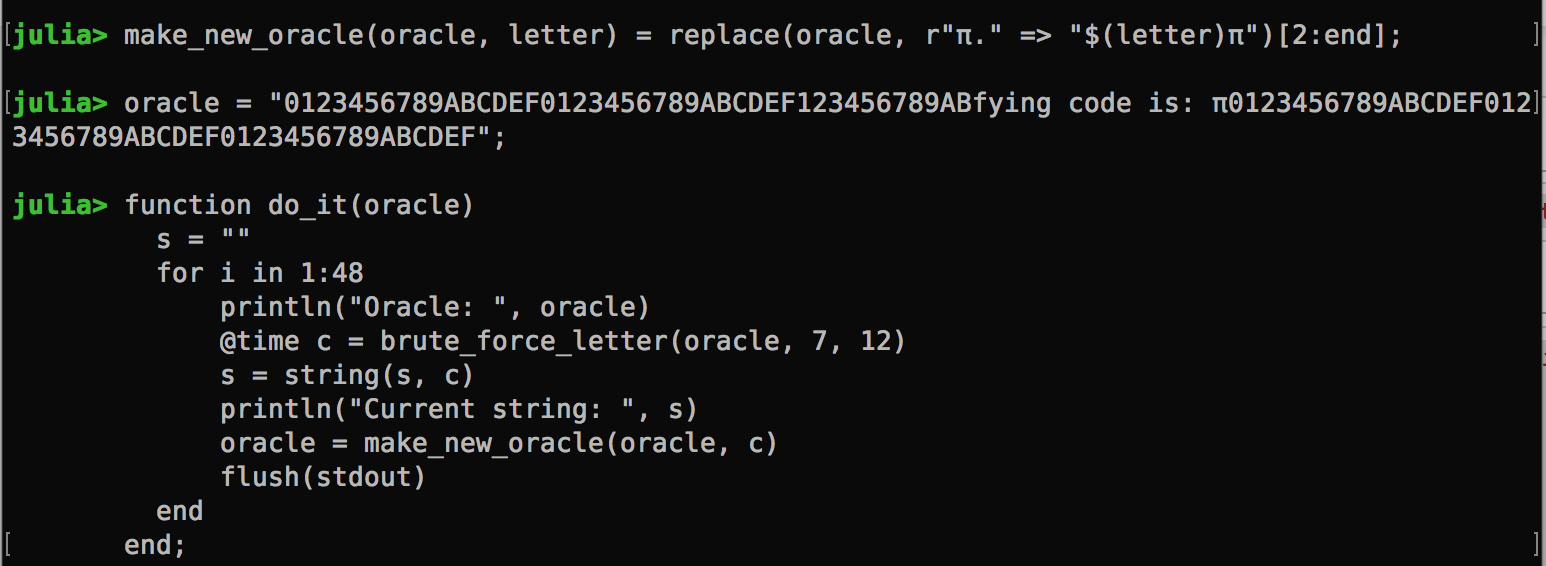
Running it deciphers the agent code one character at a time.
That’s all, folks! Happy hacking!